At this point I should say that I didn't have the idea of doing a blog post on assembling him (I should have done but the excitement overwhelmed and I jumped into it). However, Chris suggested it would be good to read and I agreed that it may help anyone assembling a Judicator in the future. So here it is, my guide/experience assembling a Judicator (painting will hopefully come later).
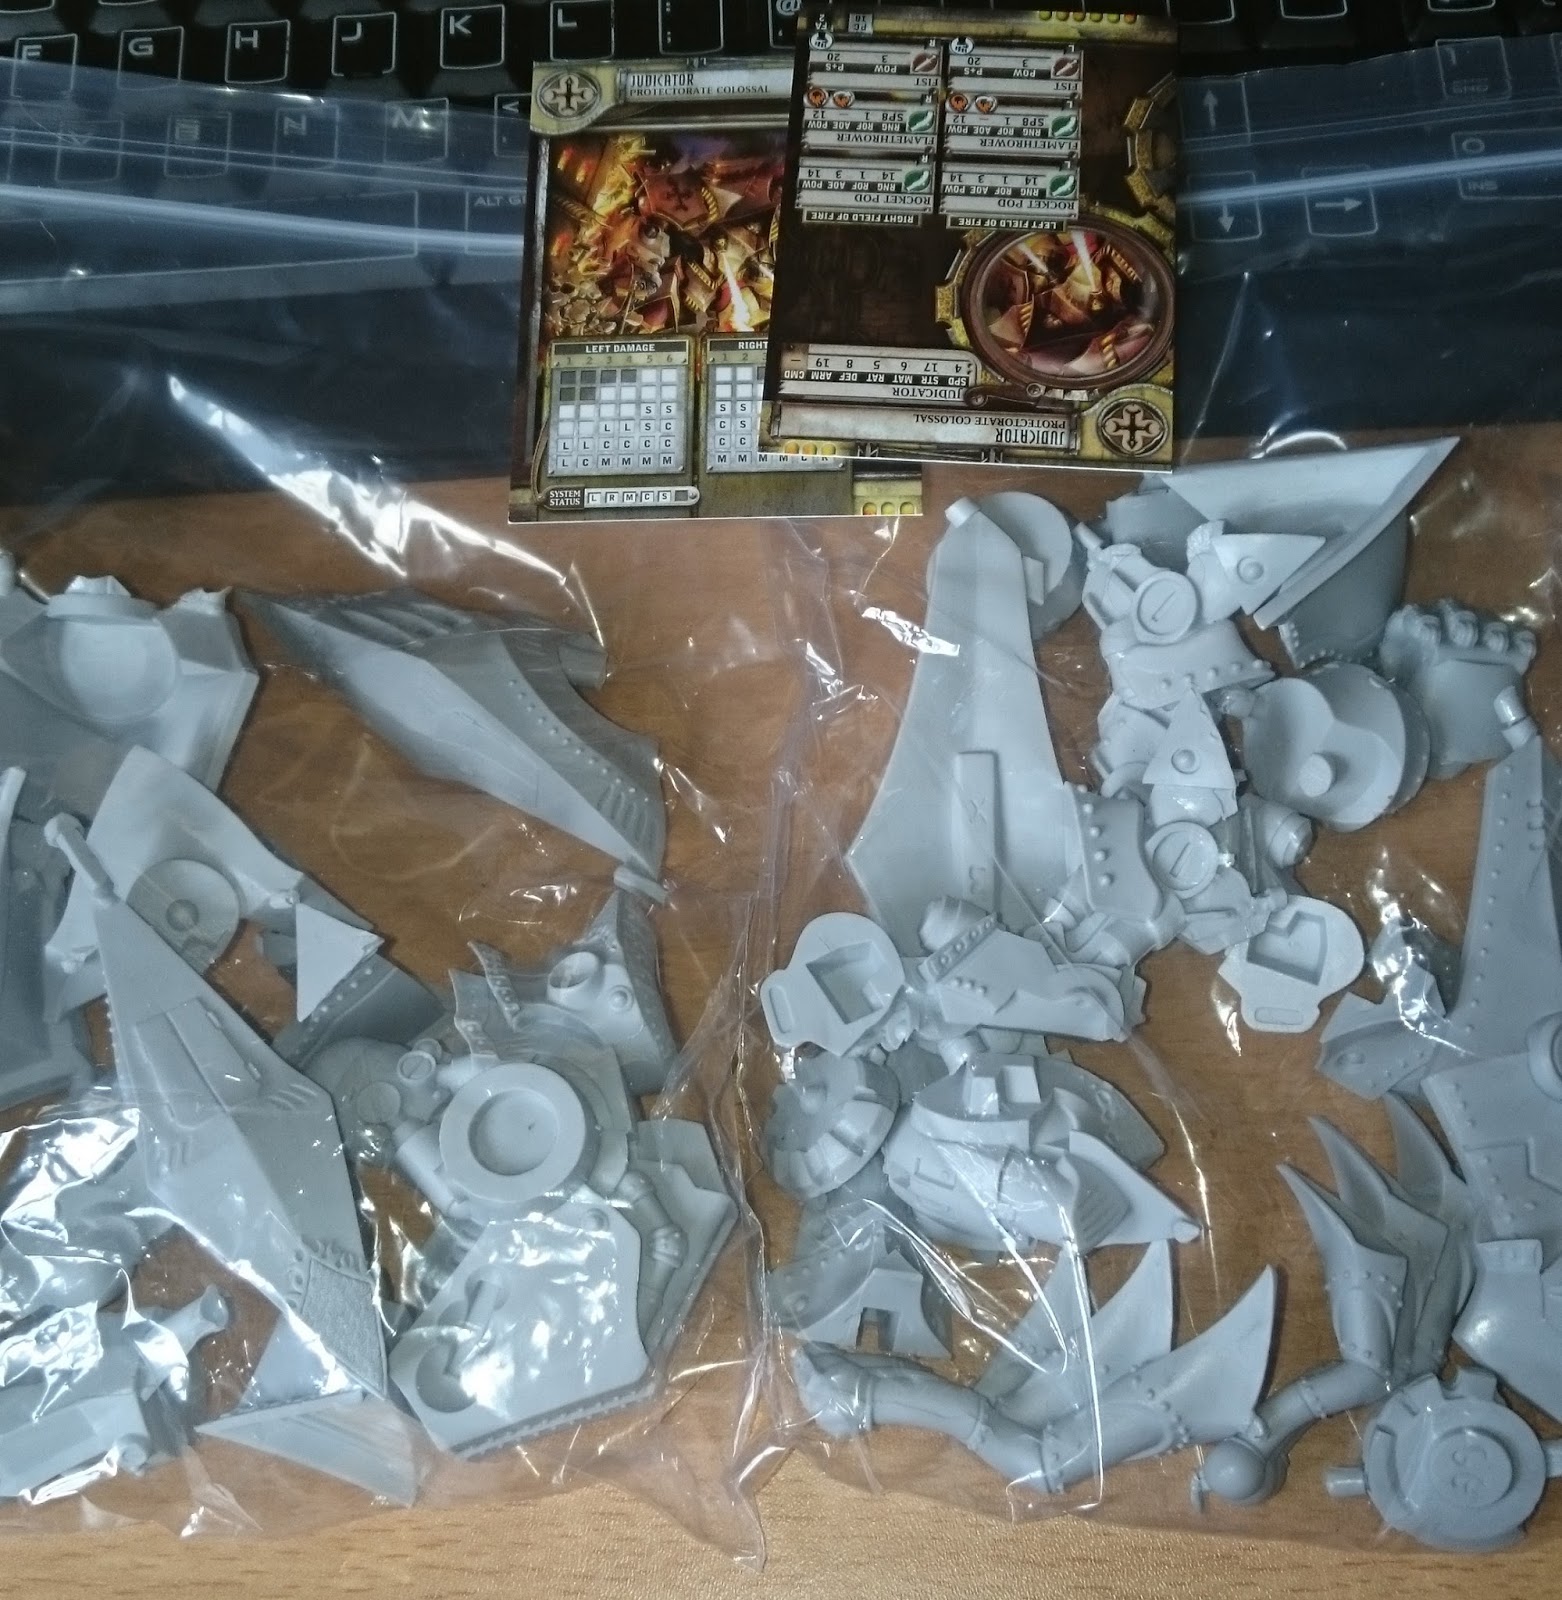
So whats in the box?
- 59 resin and metal parts to make the model (24 part are the rocket tips and port covers)
- Card wreck marker
- 2 x Stat Cards
- Instrutions sheet - I use the word instruction very loosely!
The "Instructions"
Hmm yes well, whilst they are functional and show how everything goes together, an A6 photocopied sheet do not the instructions for a £80+ model make.
The assembly
The first thing you will notice when you get the bits out is the sheer volume of excess material on the bits. I've highlighted the below photo to try to give you an idea:

Whilst I understand that this is pretty much the norm for resin kits and its just part of the process, I think its worth while highlighting how long it actually takes to clean up all of the pieces. Having spent good money on the kit its worth spending the effort making sure every surface is smooth and the tags have all been completly removed and filed back. This should aid the bonding process but also improve the aesthetics when it comes to painting.
2) Base-Hips
The bottom of the model was the easiest part to put together. The key thing to note here are that the legs come with the front unattached to it feels at first like they're being attached backwards.
The first parts I glued together were the hip joints for both legs. These are preshaped sockets similar to those on the plastic jacks (so you can't get them backwards :-) ). I then attached the toes/front of feet and stood them on a plastic sheet to ensure that they dried as flat as possible. I was a little worried when I checked before gluing that they could be angled to down which would have been a nightmare to attach to the base, so I hoped by standing up early on it would avoid this.
Before I attached any more I decided to glue the feat to the base. My thinking behind this is that I could hold the model by the base as I assembled it and hopefully not put to much excess stress on the newly glued parts. I got he alignment from looking at photos online and from placing the torso above to get an idea of where it looked like it was facing - its essentially an angry left foot forward stance! I then left this for a good half hour to dry pretty solid.
3) A note on metal parts and pinning
In the final phtoos below you will see the silver coloured metal parts in the model. With the exception of what I will call the Elbow connectors these can all be attached after everything else so I left them till the end.
For all of the pinning on the model I used a 1mm bit and paper clips. Whilst I know others have used brass rod paperclips are both what I had and also what I am familiar with. I also didn't want to go putting too bigger holes in the model.
4) Hips-Torso
So my first bit of pinning on Stompy (this name appeared later on when I was cursing at him and the rocket pods), the ball and socket joint that attachs the torso to the hips. Whilst I know that ball and socket joints are fairly solid once dry I also know that they can be a pain to hold in place whilst the glue dries as they slip very easily. As this was also the single joint supporting the entire upper half of the miniature there was no way I wasn't pinning this and making my life easier!
So first I drilled into the centre of the socket and inserted a pin. I positioned the torso in postion and applied pressure to leave a mark in the resin. I then took it apart and drilled where the mark was left - this resin stuff makes this easy!
After that I glued it all together and also glued on the exhaust funnels, armour panel above the head and the head itself - well everyone needs a face. I also glued on the thigh shielding to the legs as these were the last resin parts on the legs.

5) Torso-Missile Pods
So I'm thinking, I'm half of the way through the build and not really had any issues at all, this colossal thing is easy - heres where Stompy hit back. The missile pods (diamond shape below) attach to the top of a disk that in turn attaches neatly using a circular key into a circular hole in the arm socket (see dodgy diagram below!)

My main problem in hindsight was that I was trying to angle the pods too high (35-45 degree angle) as thats how I'd envisoned them working. However at this angle they interfere with the exhaust vents. I then thought I must have attached the exhaust vents wrong (please note this is actually impossible based on the inserts and differnet size shapes) so gently popped them off to take another look. I realised my mistake, and the fact that the rocket pods should be pretty much horizontal (depending how you positioned the waist).
This next part was my most frustrating bit, I had to reattach the exhausts, glue the disk to the torso and the missile pod to the disk. I decided to do this all at once as it would ensure that the whole lot would fit and I wouldn't then find I couldn't attach another part. The first arm (that I hadn't glued at all when I attempted first time) went on super and with a little bit of tweaking was on and sorted. Well the next one is the same surely?! No, as this had already started to be glued it wouldn't stick solid like the first. Also the guide on the disk and the guide on the pod didn't lock in the same as the other side. However, after numerous shouts of "You -****ing Stompy ******d" (and so Judy was Christened) and some really helpful laughter from my wife, I got it all attached and vowed to let it dry before I went anywhere near it again! I also checked the shoulder pads would fit in place properly which required a little tweaking - worth doing now though before it all dried!
6) Shoulders
The good bit about this is that the arms and shoulders are probably best assembled separately first and then attached in the final stage. This mean that stage 5 could dry whilst I was doing them.
The shoulders are each amde up of a large shoulder pad, a barrel shaped insert and a metal elbow joint. I pinned each piece to each other as I thought the entire arm would take the most leverage so would need to be as strong as possible. The pins were drilled in line with the way the parts fitted together (see below in red).

I also drilled a pin horizonatlly into the should to attach to to the disk on the rocket pod. Again this was to strengthen the whole arm as I didn't think that the cutouts bonded together as well as they could do. I didn't attach this to the main model until stage 8 though.
7) Arms
The forearms, hands and shields all went together really well and seeing as there was no weight on them I couldn't really envisage them needing it. The part that would need the strength is the ball and part socket joint at the elbow. I assume that this is the reason it is made out of metal to save it sheering off if excess force is applied.
However again thanks to the softer nature of the resin I was able to drill into the metal socket and then use a little pressure to accurately put a mark on the ball to mark where I needed to drill. Again I checked it all went together ok but didn't glue them to the shoulders.
8) Putting it all together!
Having spent the time making sure the pins were all in the right place, all that remained was to slowly and carefully glue it all together. I'm actually surprised how well it all went together, first the shoulders to the torso and then the arms to the elbows.
9) Missile Pods & Metals
With all the resin parts attached all the remainign metal was atatched. The knees, nipple guns, Reliquary (metal bit on top) and boiler were glued into place - nice and easy!
The last bit was the missile heads and missile port covers that were fairly straight forward just very tricky. I may well regret attaching them as I can see them getting knocked off very easily. Ah well, at least it is fully assembled for the moment.
10) Done!!!
Well it only took around 4 hours but well worth it! And here are the photos of one fully assembled Judicator - aka Stompy!


Its so cool!! Maybe one day you will also be cool....
ReplyDelete